


Many services in Windows 11 are linked and dependent on each other. This includes your location, time, and language. There are some programs that may not work properly because the time isn’t set correctly, may refuse access because the region isn’t correct, or there are cases where to change the language in the app you need to change the language of the system.
In the case of time in Windows, it will be set by default to your location when you connect to the Internet. However, no one forbids you to set it manually if it isn’t updated automatically or if you just want to change it for other reasons. You can do this with the settings in just a few clicks.
Why you need to change time and timezone in Windows 11
The most obvious reason you might need to change the time zone or just the time is to move to another part of the country or the world. The modern world allows you to start your day in Asia and end it in South America, for example. For these reasons, it might be useful to know how you can change the time on your Windows system.
Also, sometimes some programs that have processes that communicate with your system may not work correctly if you set the time incorrectly. In this case, it usually helps to set the time to auto-update, but in some cases, it may help to set the time and date correctly manually.
If you have a bug and the time doesn’t update or change, you should start with a Windows update, as usually such bugs are fixed very quickly by Microsoft. In any case, you can quickly change the time directly from the settings on your PC.
Read also:
- How to remove the ‘System Requirements Not Met’ watermark in Windows 11
- How to test your microphone on Windows 11
- Is Windows 11 better than Windows 10 for gaming?
What to do to change the system time in Windows 11
If you need to change the time, it’s pretty easy to do. The main thing to remember is that you better set the current time if you use programs that connect to online services. In order to change the time in Windows 11 you need:
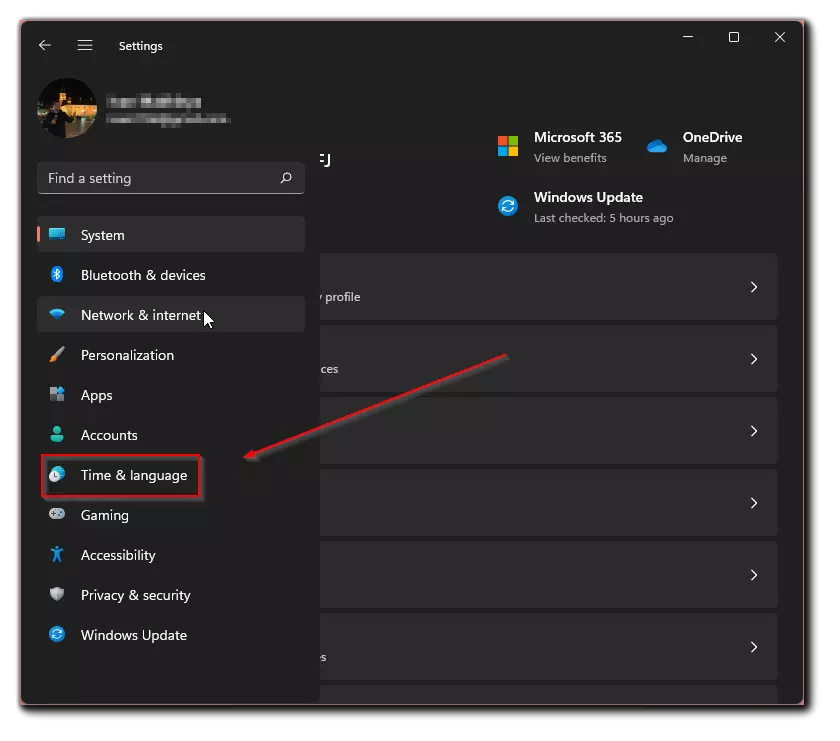
- Go to the settings with the key combination Win + I.
- After that, you need to go to the Time & Language tab.
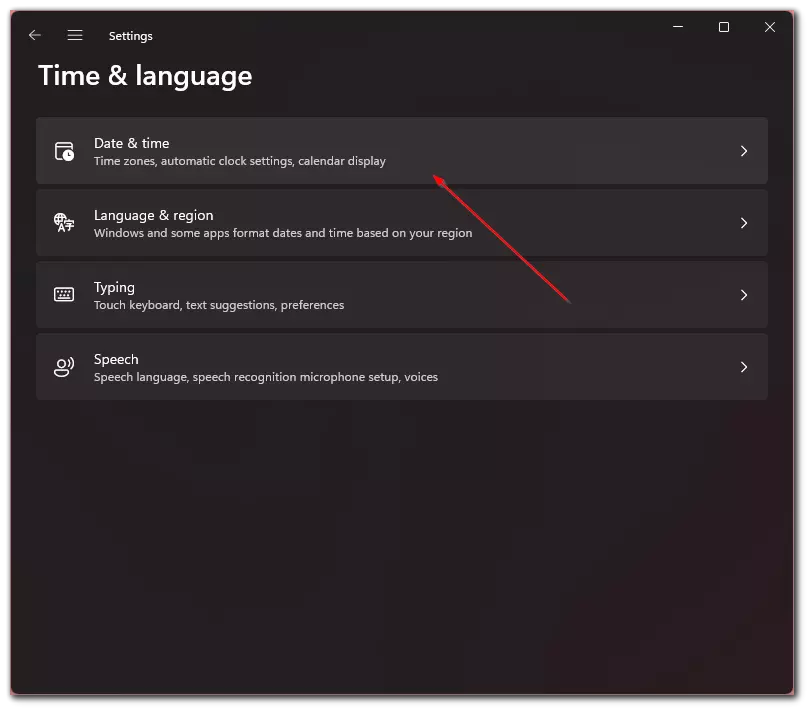
- Then go to Date & time.
- Here you need to turn off Set time automatically, after that click on the Change button at the bottom.
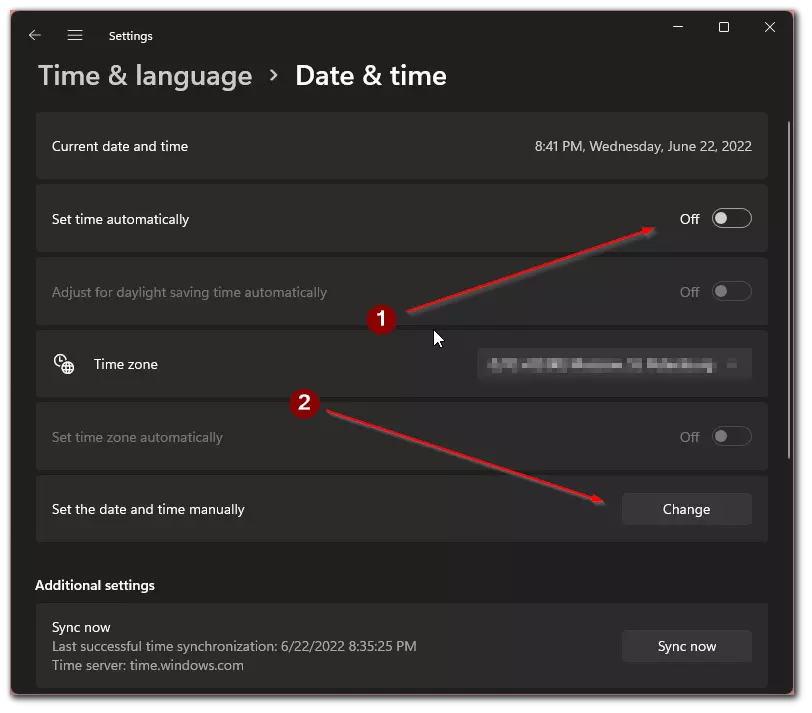
- At the end of the pop-up menu, you need to set the time and date and click Change.
In addition, you can press the Sync now button so that Windows synchronizes the time automatically using the Internet. You can also simply change the time zone under the Time zone tab.
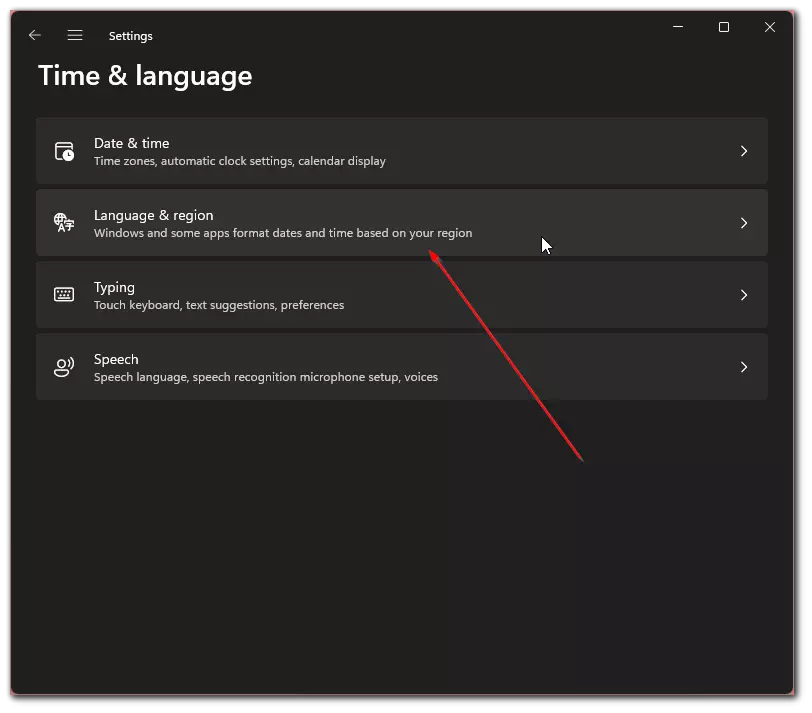
How to change region in Windows 11
If you have moved to another place, you probably also need to change the region. However, you should be careful, because changing the region can block some features that don’t work in that area. Besides, you will need to change the region separately in other services, such as Microsoft Store. To change the region in Windows 11, you need to:
- Open the Settings using the start menu or the Win + I key combination
- Then you need to go to the Time & Language tab.

- Here go to Language & Region.
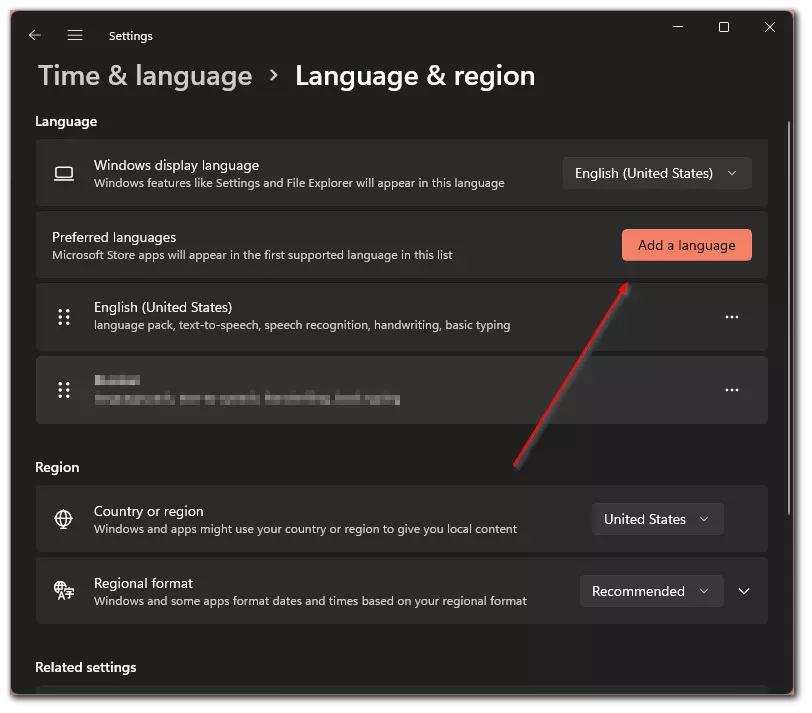
- At the end in the Country or Region tab, you just need to select your region in the drop-down menu, after that you need to restart your PC.
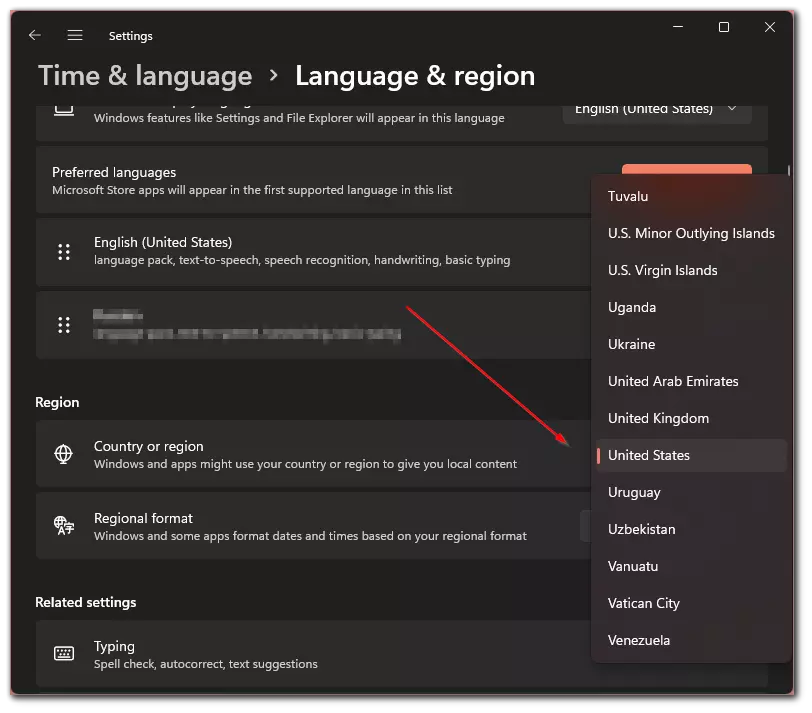
Doing this is pretty easy and the region will change in most of the standard services in Windows. If you can’t find your region, you should try to install the latest update, it may have already added your region.
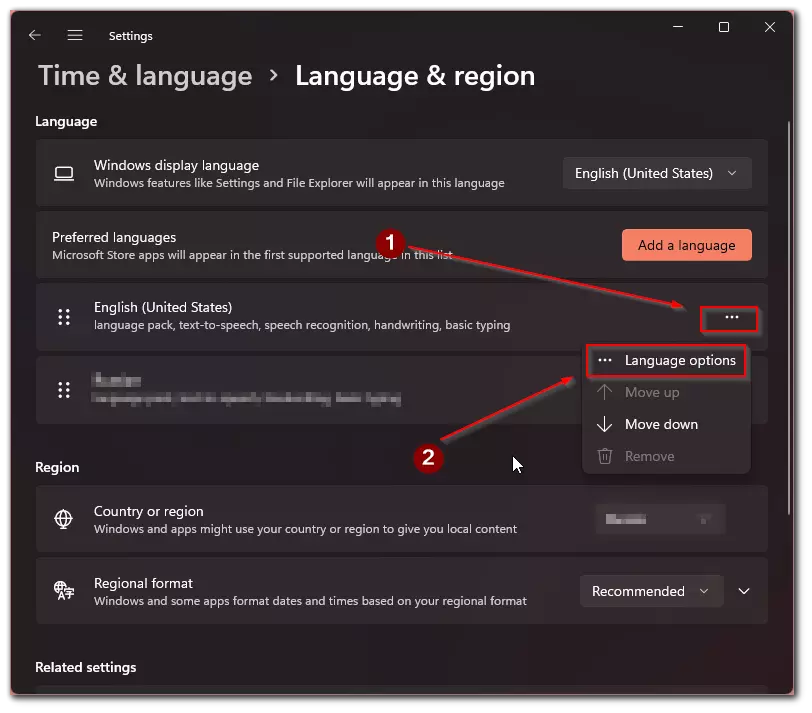
How to change language in Windows 11
In some cases, you may also need to change the language of your system in Windows. This is also quite easy to do, although in some cases for languages that aren’t widely spoken, or if you have only one language pack on your Windows system you may need to connect to the Internet to download the language pack you need. In order to change the language on your windows system you need to:
- Go to Settings and then to the Time & Language tab.

- Then go to Language & Region.
- Here in the topmost row called Windows display language, you need to select the language you want from the drop-down menu.
- If the language you need will not be in the drop-down list, you need to click on the Add Language button and select the language you want, then it will be downloaded and appear among the offered languages in your system.

- After that, Windows will ask you to re-login, just click on the Sign Out button and log back into your account.

It’s pretty easy to do and doesn’t take much of your time. In addition, when you change the language, many programs will automatically adjust to the language of your system, including voice input or voice assistants that are installed on your computer.
Read also:
- How to forget a saved Wi-Fi network on Windows 11
- What is DirectStorage on Windows 11, Windows 10 and Xbox
- How to place Windows 11 taskbar on the left side
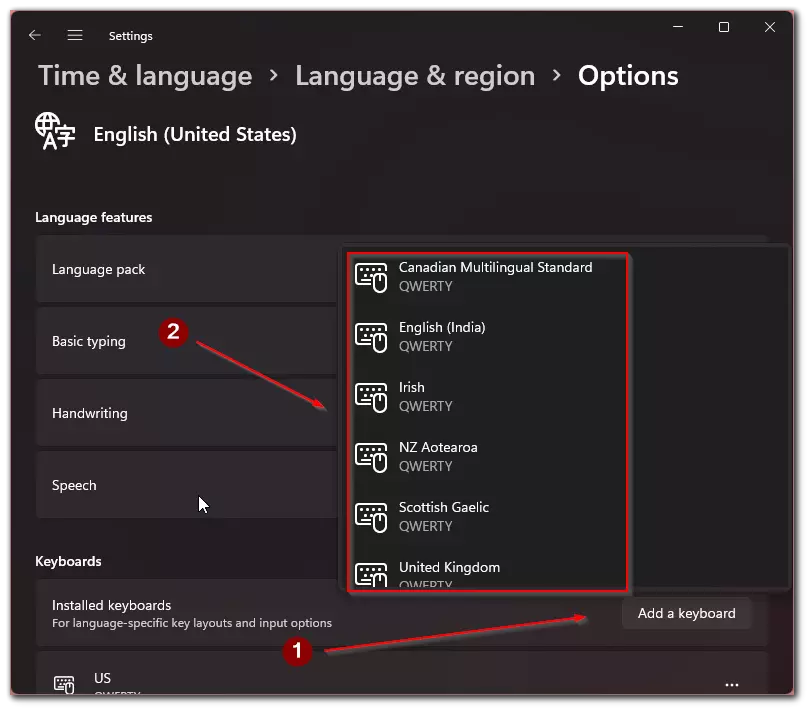
How to add an additional keyboard in Windows 11
If you have already changed the system language, you will probably also need to change the layout of your keyboard. It is important to remember that not all languages have a standard QWERTY keyboard layout. It is a good idea to get yourself a new keyboard with a local alphabet to understand exactly where and which letter you will be using.
In order to add a keyboard layout, you will need to follow the steps in the previous list and add the desired language to your computer using the Add Language button. After the language pack is downloaded you need to:
- Click on the 3 horizontal dots next to the language you want and select Language Options from the drop-down menu.
- Here you just need to click on the Add Keyboard button and select the layout that suits you best from the drop-down menu.
You can change the language on the left side of the taskbar. You can also customize additional buttons on the taskbar such as an on-screen keyboard or even restore taskbar labels to their Windows 10 or Windows 7 look.


