


In 2022, Samsung introduced a new accessory — an automatic rotating mount for its TVs. And yes, there was even a floor-standing version. The idea was to bring the unique rotating experience of The Sero TV to other Samsung models. Interestingly, just a year earlier, in 2021, Samsung had released a simple floor mount that allowed TVs to be placed on the floor rather than mounted on the wall. However, neither the floor stand nor the automatic rotating mount gained much popularity with consumers. Considered more of a novelty than a necessity, both products were quietly discontinued soon after.
A list of Auto Rotating Wall Mount and Auto Rotating Studio Stand compatibility list Samsung TVs
Samsung’s automatic wall mounts are compatible with Neo QLED and The Frame series TVs with screen diagonals from 43 to 65 inches. There are two sizes of horses, and they apply depending on the size of the TV. In the table below, you can see which mount fits which TV.
| Wall Mount type | 22 The Frame | 22 Neo QLED 4K | 22 Neo QLED 4K | 22 Neo QLED 4K | 22 Neo QLED 8K | 22 Neo QLED 8K | 22 Neo QLED 8K |
| VG-ARAB22WMT | LS03B 43-55” | QN85B 55” | QN90B 43-55” | – | – | – | – |
| VG-ARAB43WMT | LS03B 65” | – | – | QN95B 55-65” | QN900B 65” | QN800B 65” | QN700B 55-65” |
| Stand type | 22 The Frame | 22 Neo QLED 4K | 22 Neo QLED 4K | 22 Neo QLED 4K | 22 Neo QLED 8K | 22 Neo QLED 8K | 22 Neo QLED 8K |
| VG-ARAB22STD | LS03B 43-55” | QN85B 55” | QN90B 43-55” | – | – | – | – |
| VG-ARAB43STD | – | – | – | QN95B 55” | – | – | QN700B 55” |
Why was the Auto-Rotate Mount invented and how does it work?
Let’s say you like watching videos shot vertically — this mount makes that easy to manage. Of course, there are mounts you can rotate manually, but it’s much nicer when the TV turns by itself. You can also use this mount to set up your TV as an advertising screen or for small presentations. The mount supports screens up to 65 inches, making it suitable for small rooms with a limited audience of about 10–20 people.
The automatic mount is designed to work with your Samsung TV and smartphone. With this setup, you can get the most out of the device. When you mirror your phone’s screen to the TV, the mount automatically adjusts to the correct position and rotates the screen. The mount must be plugged in — it has an electric motor that handles the rotation.
Connecting the Auto-Rotate Mount to Your TV
To use the Auto-Rotate accessory, your TV must be paired with the mount after installation. The mount features a built-in Bluetooth module that enables communication and control. Follow these steps to connect the device:
- Pair the mount: On your Samsung Smart TV remote, press and hold the Settings/Number/Color button and the Multi-Window button simultaneously for at least 3 seconds. This will complete the pairing process.
- Check installation: Pairing is only possible after the Auto-Rotate mount has been properly installed and the TV is set up. Make sure the cables are positioned correctly so they don’t get in the way when the TV rotates.
- Switch modes: Once pairing is complete, you can switch between landscape and portrait modes by pressing and holding the Multi-View button on the remote for a few seconds.

If the mount has previously been paired with another TV, the connection via the remote may not work right away. In that case, use an alternative connection method or simply reset the mount before pairing again.
Reconnect the previously used Samsung auto-rotate mount
If your Auto-Rotate Mount was previously paired with another TV, you’ll need to reset it before reconnecting. There are two ways to do this:
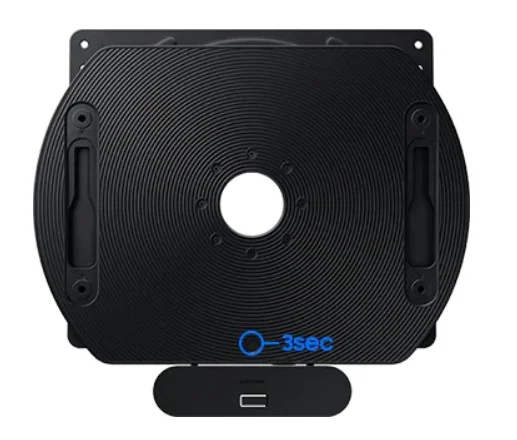
Method 1: Use the Reset Button
This method resets the Bluetooth connection and creates a new link.
Step 1. Connect the Auto-Rotate Mount to a power source.
Step 2. Press and hold the Reset button on the back of the device for about 3 seconds.
This will initialize the mount, erase the old pairing information, and prepare it for a new connection.
Method 2: Power Reset (if you can’t reach the Reset button)
Step 1. Unplug the power cord of the Auto-Rotate Mount from the wall outlet and wait at least 15 seconds.
Step 2. Plug the power cord back in and wait 5–10 seconds.
Step 3. Repeat Steps 1 and 2 (unplug → plug in) three times to trigger initialization mode.
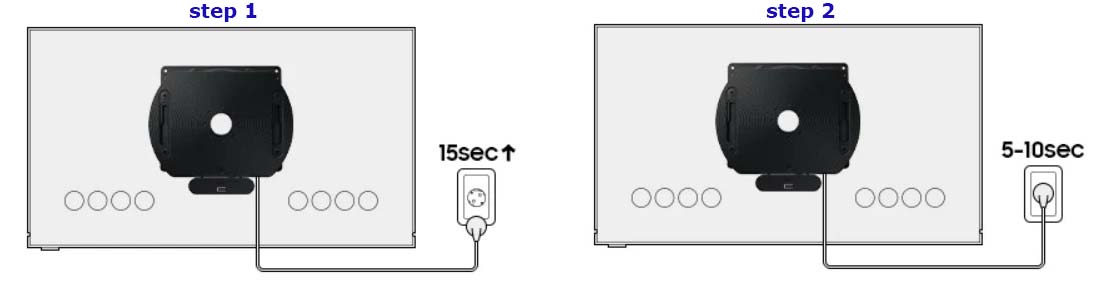
After losing power three times in a row, the mount will automatically enter initialization mode.
You can then reconnect it — for example, by playing a video on your phone and enabling screen mirroring. When you open Bluetooth on your phone, the mount will appear in the list of available devices, ready to pair.


