Windows 10 contains several accessibility settings. That is built in to make it easier and more widely used by people who have difficulty using all the normal features of their computers.
One of these is Narrator, which is essential for people with visual, hearing, or dexterity impairments. You can set up Narrator on your Windows 10. Also, disable it completely or get rid of it completely.
What is Narrator on Windows 10?
Windows Narrator is a lightweight screen-reading tool. It reads aloud information from your device’s screen, such as text and interface elements. Its purpose is to make it easy to interact with links and buttons. Along with this, provide descriptions of images. Windows Narrator is available in 35 languages.
You can use Narrator to read and write emails, browse the web or interact with documents. Commands can be used to navigate, you can also adjust the speed, tone, playback volume, and select other voices in the program.
It also works so that the narrator voices the text on the screen, and reads items when you hover over them, click or tap. The area that is currently being played by the utility is outlined with a blue outline.
Read also:
- How to fix Windows 10 activation error code 0xC004F213
- How to fix not showing WiFi networks on Windows 10
- How to fix ntoskrnl.exe high RAM, CPU, and Disk Usage on Windows 10
What to do to turn on or off Narrator on Windows 10?
The easiest way to open the Narrator settings is to press Win + Ctrl + N. This opens the ‘Preferences’ app directly in the settings section of the Narrator. In this window, you can move the slider to enable or disable Narrator on Windows 10.
However, there are cases when this combination doesn’t work or you may get an error. Then you can follow these steps to turn on or off Narrator on Windows 10:
- The first step is to open the settings with the Start menu or the Win + I key combination.
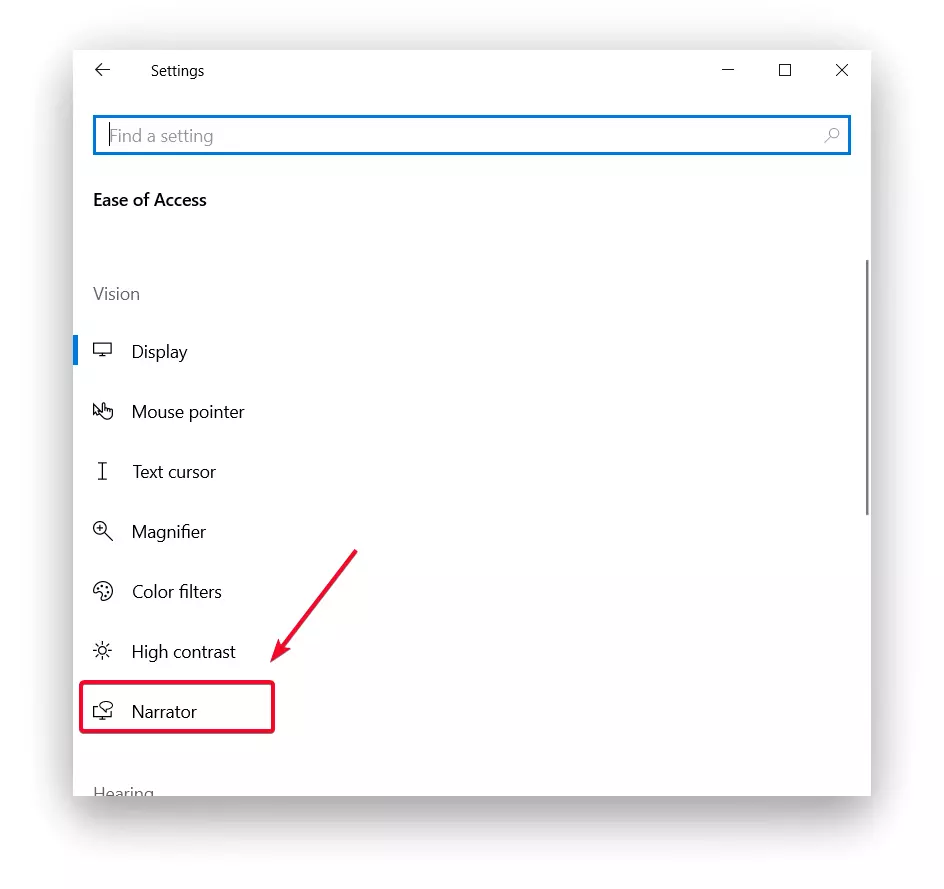
- After that from the list of items, you need to select ‘Ease of Access’.
- Next, you need to select the item ‘Narrator’.
- Then under ‘Use Narrator’ select on or off with the slider.
If you only want to pause reading, you can press Ctrl. This will help you not to disable the feature. After you need to resume reading you need to press Caps Lock + M.
What to do to set up the Narrator in Windows 10?
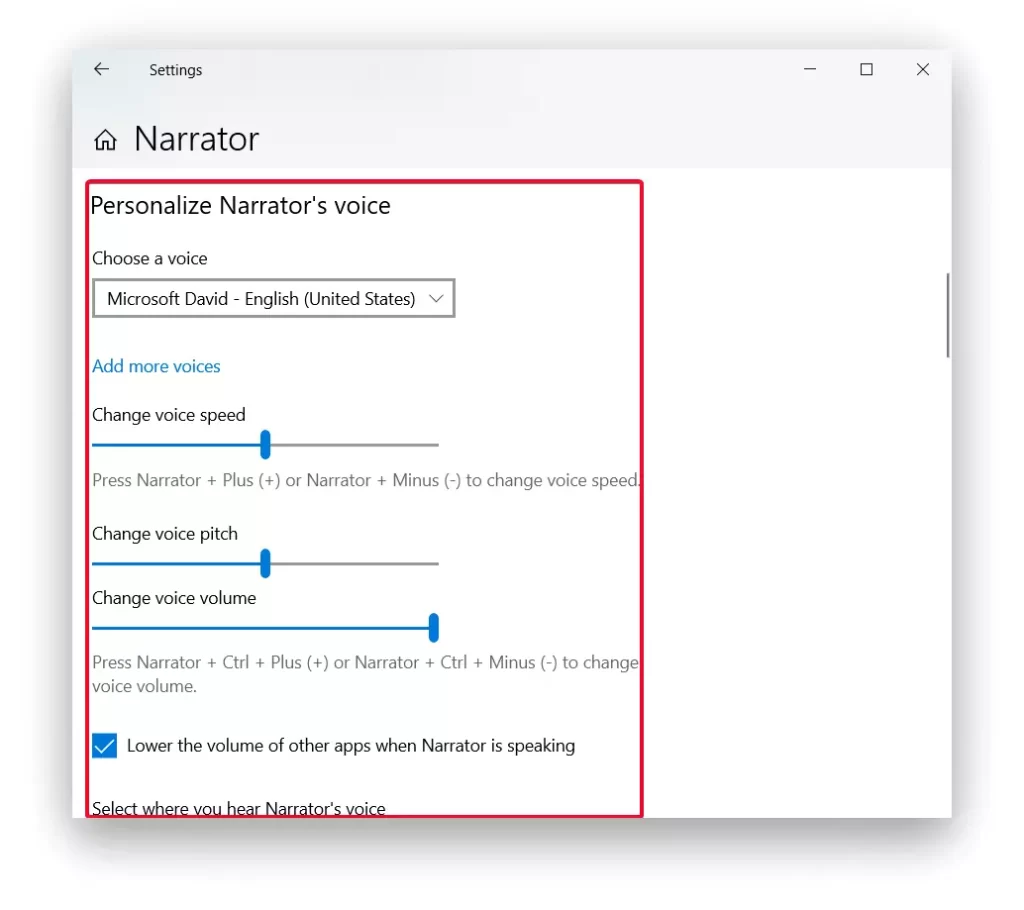
There are a lot of Narrator settings available that you can change. This will help you use the Narrator in a much more convenient way. All of the settings are available under ‘Narrator’.
One of the most important settings is the voice of the screen reader. In the settings of your PC or laptop, you can change the narrator’s voice, as well as the reading speed, pitch, and volume of the voice. In addition, you can determine whether the narrator should pause according to punctuation, emphasize formatted text, or reduce the sounds of background apps when reading.
You can also customize the keyboard. This section contains controls for choosing between Standard and Obsolete keyboard layouts. The Standard layout, which is the default setting, allows you to use updated keyboard commands. It also gives you the possibility to set the modifier key of the Narrator, using Insert instead of CapsLock. In this format, it looks more like other screen reader apps. The outdated set is more like the ‘Narrator’ in previous versions of Windows.
These are the most necessary settings that many people adjust to using Narrator in a more convenient format. You can go to the Narrator section of the settings and choose what is most necessary for you. To make it more comfortable to use as needed.
Read also:
- How to fix Windows 10 “The Display Settings Could Not Be Saved”
- How to change or customize the mouse cursor on Windows 10
- What is the process SearchIndexer.exe on Windows 10
What to do to completely turn off the Windows 10 Narrator?
You can turn off the Windows 10 Narrator completely. Do it without much intervention in the system, by changing several settings and by renaming. You can also choose to change the permissions of the file narrator.exe, which is the executable file of the narrator.
To follow the first method by changing several settings, follow these steps:
- The first step is to open the settings.
- After that, you need to select ‘Ease of Access’.
- Next click on ‘Narrator’.
- You need to make sure that Narrator is turned off and uncheck ‘Allow the shortcut key to start Narrator’.
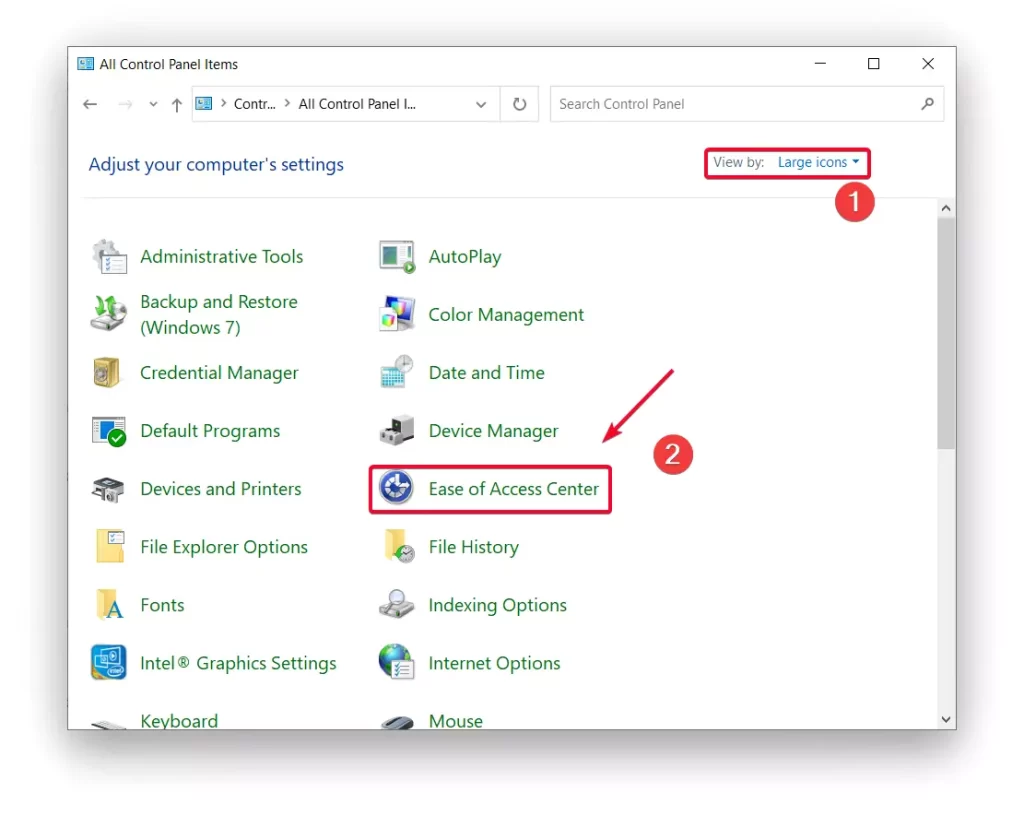
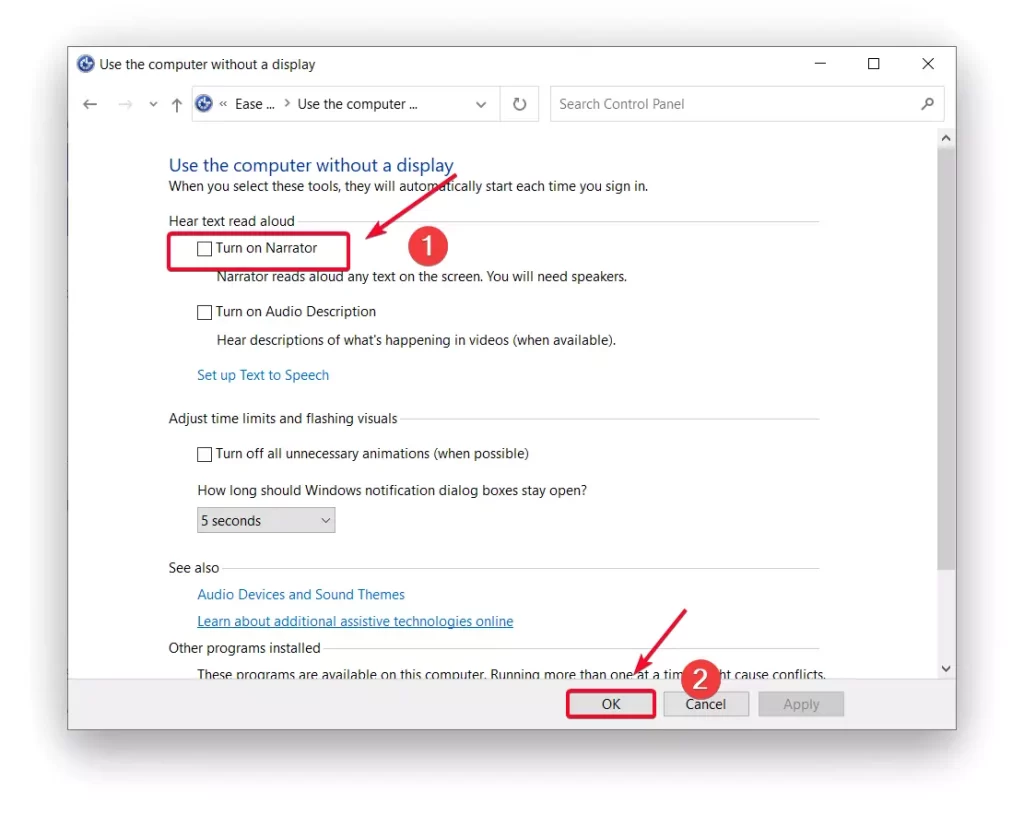
- Then open Control Panel, you need to select view by large icons and ‘Ease of Access’.
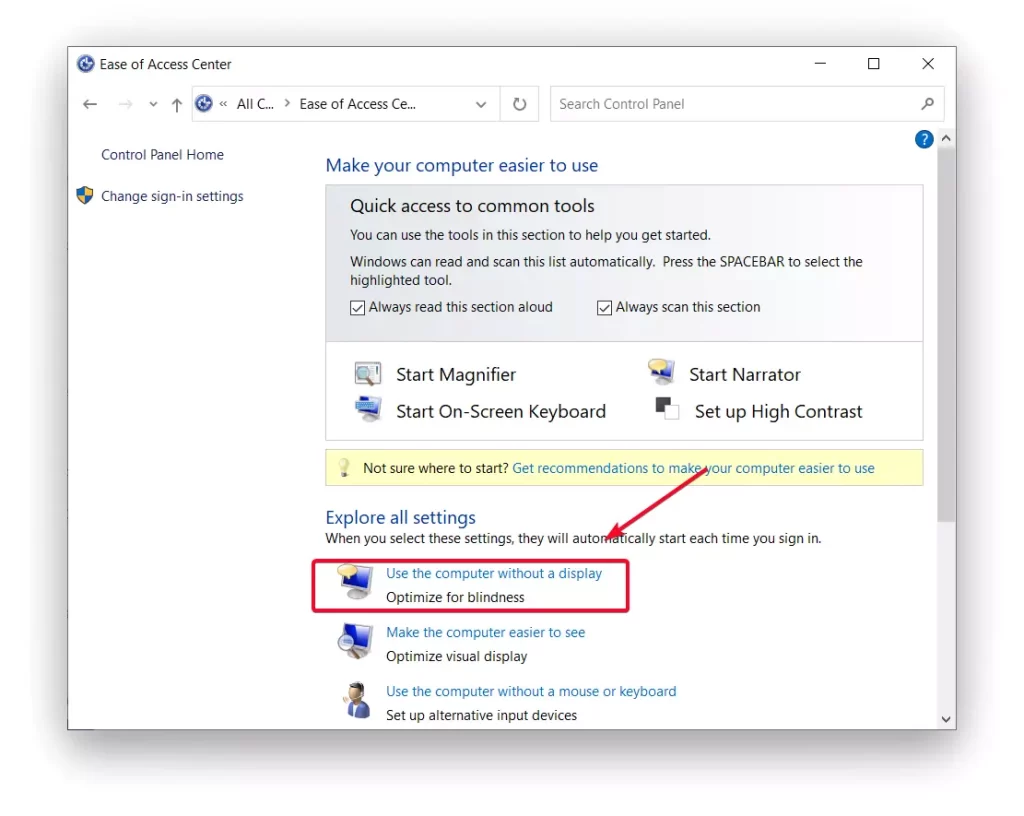
- Then click the ‘Use the computer without a display’ link under the Explore all settings section.
- Uncheck the ‘Turn on Narrator’ checkbox and select ‘Ok’ to confirm.
You can also choose another way to completely turn off the Windows 10 Narrator. The second method involves renaming the file narrator.exe so that Windows 10 can’t run it when it tries to turn on the narrator or change the permissions to run this file for the same purpose. The process consists of the following steps:
- You need to become the owner and get full rights to access the file C:\Windows\System32\narrator.exe.
- Next rename the file to something else, or in the permissions to disallow reading and executing the file for the current user. Since the process of narrator.exe is launched on behalf of the user.
- Then using the Easy Context Menu program you need to enable the file context menu item to get the owner. Then use this item on the file narrator.exe.
- Once you own the file, go to the file’s properties, open the ‘Security’ tab, and click on the ‘Change’ button. Select your username and check the ‘Deny’ box under ‘Read and Execute’ and apply the settings.
Now the file won’t be able to run, and consequently, the screen reader will be completely disabled. However, keep in mind that the file permissions may be restored during Windows 10 updates, especially in the case of version upgrades.


